Wip: Custom cover

32special

Active Member
Just wanted to share a project of mine with you folks of intrest. After long thought I took the plunge and went for it. Making my own 263 finned valve cover wasnt going to be hard, finding a inexpensive shrink rule and making the master was.
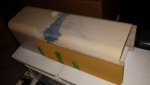
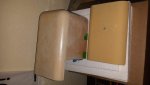
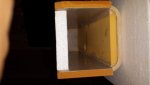
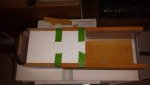
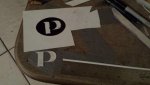
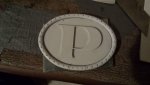
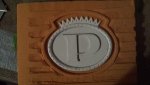
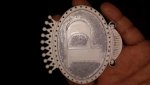
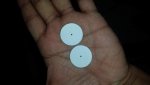
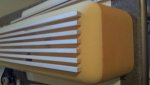
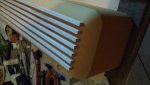
Im using foam as my base wich will later be soaked in a epoxy to make it more firm and able to withstand a casting in resin. This is were im at so far. It will consist of 10 fins with a filler hole in the usual place and a logo in the center. I have everything already made just waiting on my epoxy to soak the foam and actually get started. Ill keep this thread posted. Not much to see but its a start.
 

Attachments

  • 20150326_170758.jpg
    20150326_170758.jpg
    55.8 KB · Views: 19
  • 20150326_170734.jpg
    20150326_170734.jpg
    67.6 KB · Views: 17
Last edited:
Looks good, be nice to see the finish product!:thumbsup:

Soon enough. I've been playing with this epoxy and figured it out. Everything is in place just need to start putting it together. Its well close to 32" long and a bit over 5.5" so I made it in four parts. The finished cover will be 5.5" x 31" and I also made it taller to hide the more modern rocker arm assembly. The measurements were a PITA. Lol.
 
wip

A bit of were im at. The first were only a quick mock up, I haven't even gotten to the fins yet. Im still in the first stages wich is building up the actual shape of the cover.the fins and everything else come after ive established that along with the bolt holes.
Ive never worked with any of these material but getting the foam to shape was easy. The epoxy im using tends to shrink since I have to dilute it causing the foam to bend out of shape, but so far im close to were I need to be. ill adress those small details as I work my way to finishing up, there really not that noticeable and could get away with it but it bothers me.getting everything squared up has been the drag, that, and the curing of the epoxy.
the final step is the carve out the inside of the roof top and coat with epoxy for strength.
Btw: my local supply stores only cartied the foam in certain sheet so I had to do with what they had making it a model kit project.
 

Attachments

  • 20150405_202212.jpg
    20150405_202212.jpg
    46.5 KB · Views: 10
  • 20150405_202246.jpg
    20150405_202246.jpg
    54.8 KB · Views: 11
  • 20150405_202303.jpg
    20150405_202303.jpg
    37.4 KB · Views: 10
  • 20150405_203834.jpg
    20150405_203834.jpg
    57.3 KB · Views: 11
logo

Ive also been messing around with a logo wich I decided to go with moms lasts names first initial, P for Pimentel. Not sure about it yet.
 

Attachments

  • 20150328_125533.jpg
    20150328_125533.jpg
    71.1 KB · Views: 8
  • 20150327_210539.jpg
    20150327_210539.jpg
    60.5 KB · Views: 9
  • 20150328_194418.jpg
    20150328_194418.jpg
    67.5 KB · Views: 8
  • 20150329_220641.jpg
    20150329_220641.jpg
    63.8 KB · Views: 9
  • 20150330_043349.jpg
    20150330_043349.jpg
    78.1 KB · Views: 8
  • 20150405_211347.jpg
    20150405_211347.jpg
    59.4 KB · Views: 8
bolt holes

These may not seem like much but I made them by hand with the aid of some 3m sand paper and a mini hand drill. Ill be using these as bases for the bolt holes and as a guide for the fins. Youll see them in use later. Sheet styrene bout .100 thick
 

Attachments

  • 20150404_111751.jpg
    20150404_111751.jpg
    37.6 KB · Views: 9
Back
Top