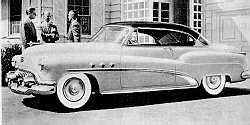
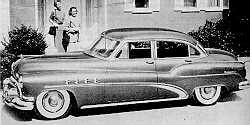
How about some technical information
Chrome TAIL FINS!
1952 Buick Production Figures
| SPECIAL SERIES |
| Model 41-four-door sedan |
137
|
| Model 41D-four-door Deluxe Sedan |
63,346
|
| Model 45R-two-door Riviera |
21,180
|
| Model 46C-convertible coupe |
600
|
| Model 46s-two door Sport Coupe |
2,206
|
| Model 48D-two door Deluxe Sedan |
32,684
|
| Model 410-stripped chassis |
1
|
| Model 411D-stripped chassis |
744 |
SUPER SERIES |
| Model 52-four-door Riviera |
71,387
|
| Model 56C-convertible coupe |
6,904
|
| Model 56R-two-door Riviera |
55,400
|
| Model 59-Estate Wagon |
1,641
|
| Model 510-stripped chassis |
1
|
| Model 513-stripped chassis |
51
|
| Model 521-stripped chassis |
900
|
| Model 561-stripped chassis |
72
|
| Model 564-stripped chassis |
48 |
ROADMASTER SERIES
4 bbl. carb &
optional power steering |
| Model 72R-four door Riviera |
32,069
|
| Model 76C-convertible coupe |
2,402
|
| Model 76R-two door Riviera |
11,387
|
| Model 79R-Estate Wagon |
359
|
| Model 710-stripped chassis |
1
|
| Model 713-stripped chassis |
81
|
| Model 721-stripped chassis |
144 |
Total Production....................................................303,745
CAR AND ENGINE SERIAL NUMBER LOCATION
The car serial number is on a plate attached to the body on left
front door hinge pillar and is also stamped on the left frame
side rail near brake master cylinder. The first digit of serial
number indicates where car was built: 1=Flint, 2=Southgate, 3=Linden,
4=Kansas City, 5=Wilmington, 6=Altanta, 7=Framingham.
The engine serial number is stamped on a boss on right side of
crankcase below push rod cover-forward of distributor on Series
40-50 and near rear of crankcase on Series 70. The last
digit of engine number indicates the series: 4=Series 40, 5=Series
50, and 7=Series 70. A stamped dash (-) about 1/4°
long directly following the engine serial number indicates a .010°
O.S. production engine.
Trim Combination
- 52-40 Light Grey Pattern Cloth
- 52-41 Pattern Cloth-Dark Grey Bolster
- 52-43 Red Leather
- 52-44 Dark Blue Leather
- 52-45 Dark Green Leather
- 52-46 Black Leather
- 52-47 Two Tone Green Cloth (Custom Trim)
- 52-51 Dark Grey Cloth-Light Grey Bolster
- 52-53 Red Leather
- 52-54 Dark Blue Leather
- 52-55 Dark Green Leather
- 52-56 Black Leather
- 52-57 Tan Leather
- 52-61 Black Nylon Pattern Cloth with Light Grey Bolster
- 52-63 Grey Cloth with Red Leather Bolster
- 52-65 Dark Green Cloth with Light Green Leather Bolster
- 52-70 Grey Broadcloth-Bolster Roll
- 52-71 Two Tone Dark and Light Green Broadcloth-Light Green Bolster
- 52-72 Two Tone Dark and Light Blue Broadcloth-Light Blue Bolster
- 52-73 Red Leather
- 52-74 Light Blue Leather with Dark Blue Bolster
- 52-75 Light Green Leather with Dark Green Bolster
- 52-76 Black Leather
- 52-77 Tan Leather
- 52-78 Dark Green Nylon Gabardine with Light Green Nylon Gabardine
- 52-80 Grey Broadcloth-Bolster Roll
- 52-83 Light Biege Nylon Pattern Cloth with Red Leather Bolster
- 52-84 Light Blue Nylon Cloth with Dark Blue Leather Bolster
- 52-85 Light Green Nylon Cloth with Dark Green Leather Bolster
- 52-86 Red Leather
- 52-87 Dark Blue Leather
- 52-88 Dark Green Leather
- 52-95 Blue Leatherette
- 52-96 Green Leatherette
- 52-97 Red Leatherette
- 52-98 Black Leatherette
- 52-99 Tan Leatherette
Stuff I have done or learned! (maybe)
- An oil filter that fits is a Baldwin P26.
-
Front shocks-
My shocks were still wet and in apparently good condition except for the leather seals
which were leaking. I decided to attempt replacement. I disassembled them one at a time so to have a
reference for travel etc.
After surgically cutting the wishbone with my hacksaw, I found they drove apart with a hammer and drift
fairly nicely from one direction. I found the reason when assembling them, the shaft cuts its own splines
in the actuating lever (remember this for re assembly).
I removed the end caps with a chain wrench (perhaps an experienced Buick mechanic would cringe,
but ignorance is bliss), I found the bushings to be in good condition. The shaft was pitted where the
seals once rode. I turned it using carbide tooling on my lathe and found it cleaned up very nicely.
One seal was a direct replacement, National no.472452, the other was impossible to match and I decided to use
National no.20x28x6 and build a bushing.
After cleaning the gaskets (I put a very light film of silicon on them), putting some light oil between the end
plates and end caps, I carefully line up all splines and pressed them back together. (remember direction
of splines in the actuating lever, and test travel position against the other shock)
I welded them with one pass of 7018 on each side.
-
Cam bearing tool-
I built my tools to the following sizes (if anything they are large and could be .005° smaller)
| bushing guide |
lip |
| 2.140° |
2.260° |
| 2.110° |
2.230° |
| 2.075° |
2.195° |
| 2.040° |
2.160° |
| 1.750° |
1.870° |
The bushings are sized so the can be wrapped with electrical tape to protect the bearings. The tape can
be stretched to adjust the diameter of the bushing guide.
-
Rear main seal
I had trouble with the seal not fitting. The .300 cork was supposed to gently squeeze into the .240 slot
between the cap and the block. Needless to say it did not. I was fortunate that when scavenging through
the surplus seal bow at my G. M. dealer I found what I believe to be a perfect replacement. They believe
it to be from a late 80's 3.8 litre engine.
-
Exhaust Manifold Center Section, Roadmaster
For all those who wish to tell me you can buy them in the catalogues, sorry, you can't! It is unique to the '52 Roadmaster engine as it carries the first 4 barrel carburetor.
I know I am not the only person to fret over this one!!! I have been advertising for years for one with no response. I have two broken ones. I decided to attempt repair. It took a long time to persuade the good ends to come out of the center section. I soaked them in diesel for months, hoping someone would answer my ad and save me this headache. They still seemed tight. Determined, I heated them, and with a little care they began to loosen.
I then glass beaded them clean. That took a while in the badly carboned joint which I had just disassembled. I took the worse set I had for the first rebuild.
I built a circular jig with eight bolts threaded through it which fit around the center section. I also built a slug to replicate the exhaust end section.I then heated the manifold and gently pressed the crack together by screwing in the bolts on the jig watching the fit on the slug. I was able to close the crack almost to perfection. I then welded the crack.
After cleaning the joint, I found they were badly worn, and I could not hope for a seal :(... So I had to rebuild the joint. I choose to use a spray weld technique to build up the surface on the exhaust end sections. I am considering just useing brass if I try the other manifold set. I don't see why that wouldn't be satisfactory and easier to work with. I then set it up on a mill and used a boring bar in reverse to re machine the outer surface of the exhaust manifold. The fit turned out to be not bad and I hope for a good enough seal. Like many projects, I am sure I could do a better job the second time around. I expect this fix will be successful, I will know when I get around to starting the car.
-
Power Steering Hoses
The Power Steering option was only available on the Roadmaster. Unfortunately as the Roadmaster went to the V-8 in '53 this is the only year and model you will find the power steering on the straight eight! Someone had crammed some heavy duty hydraulic hoses with JIC fittings onto my unit before I got it. The fittings were originally SAE. I did a lot of hunting around and could not find the #4 SAE hose fitting required on the power box. The #6 fittings were available. After spending many hours hunting, I decided to build all 4 fittings so that they were JIC. Yes I had to build them, I could not find appropriate o-ring to JIC fittings. I choose to do it by cutting the o-ring groove into a 5/8° SAE bolt which fit properly. I then machined some JIC fitting to fit into holes drilled into the bolts and silver soldered them in place. This make a good fitting and allows you to use standard hydraulic fittings. I will now be ordering some hoses from an internet source which advertises an 11/16° hose insertion depth. I now have the hoses, and while not bad, not as good as I would have liked. I see there is now a source in the Buicks.net °Web Site Database° which offers replacement hoses if you supply specs. I would try them next.

