"Buick Trademark(s) used with the written permission of General Motors"

Authored by Wes Vann, last revised on March 22, 1997
Special thanks to the following people for input and review: Al McKenzi, Skip Cain , and Diana Todd.
PLEASE NOTE; It's recommended that you use heavy gloves any time that you are handling glass. It's also recommended that you wear eye protection.
This page is written with a 65 Chevelle windshield as the example. The method is typical of most of the older GM products.
The trim around the windshield is held in place with metal spring clips that have to be released with a special tool that is available at most automotive paint supply stores. It slides between the glass and the trim piece to catch on the clip. Once the tool catches on the clip, the tool is rotated, causing the clip to release the trim. At that time, the trim can be pulled away from the glass and you can go on to the next clip. The clips are spaced about 8 inches apart.
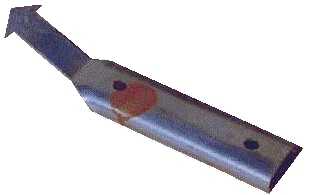
Care has to be taken with the tool due to the fact that it is possible to chip the edge of the glass when you rotate the tool. I'd recommend that you take your tool to a junk yard and experiment with it until you know how it works.
Before removing the glass, note the location of the spacer blocks at the lower edge of the glass.
The glass is held in with a round ribbon sealer (or other sealer if the windshield had been recently replaced). This sealer has to be cut out around the full perimeter (trying to push loose that last stubborn corner will result in a collection of broken glass).
There are two generally excepted methods of cutting free the glass (I've done both).
The first method involves using a piece of "piano" wire that is at least 24 inches long. It also requires two people, or a person with long arms. The wire is pushed through an easy area of the sealer and both ends are attached (tied) to a handle or piece of broom stick. The wire is then pulled back and forth through the sealer in a sawing motion. You have to be careful that the wire doesn't catch on the rough edge of the glass and chip the glass (been there, done that).
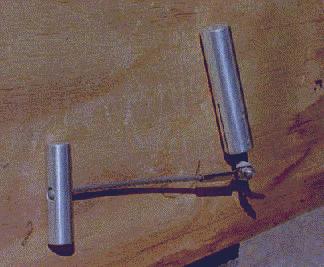
The second method requires buying another special tool that you can find at most paint supply stores. This tool has a cutting blade with a 90 degree bend in it. The one that I have has an aluminum handle (that the blade is attached to) and a pull cable that is attached to another aluminum handle. When you use the tool, you hold on to the main body with one hand (that holds the blade) and pull with the handle. This works real well, and only requires one person (I have a problem finding people to help me that I trust).
There shouldn't be any problem with the windshield falling away from the body, however if doing side glass (I have a 64 Chevelle 2 door wagon and the fixed side glass had to be cut free), I'd recommend that you use duct tape to ensure that the glass doesn't fall free (the side glass on the wagon is irreplaceable and was scary to work on!).
Prior to replacing the glass, all of the old sealer has to be removed from the body and any rusted areas repaired. Due to a certain amount of rust in this area on my car, I sand blasted it clean. Any exposed metal areas should be painted with a nonporous sealer.
To remove the sealer from the glass, I used a single-edged razor blade. I recommend that you buy a box of at least 20 of them (any household paint store) and throw them away the second that they seem rough. It's easy to scratch the glass with a blade that has a burr in it. You won't really use 20 blades, but, it will prevent you from trying to finish the job with that "last" blade. I then use a polishing compound to remove the remaining sealer. As a last step, just prior to replacement, wipe the glass down with lacquer thinner to remove any oils.
On the older GM's, the trim clips have to be replaced before the glass. This is due to the fact that they are held in place with screws (the newer GM's use a clip that slides on a weld pin, that looks like a nail that wasn't driven in all the way). New clips are still readily available, as are the screws. The screws are plated to prevent rusting and can be purchased at an automotive paint store. I put a dab of silicone on the screws with the idea that when they tighten down, it breaks the paint and could cause rusting (paranoid?).
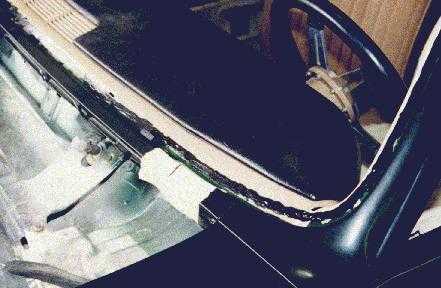
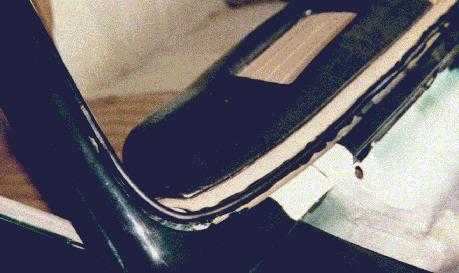
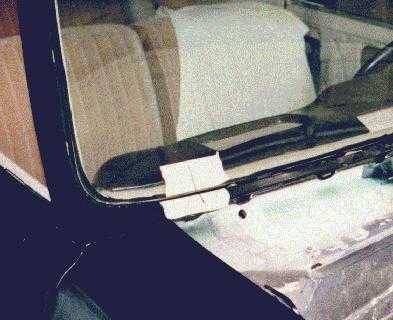
Prior to sealing in the windshield, I'd recommend that you center it in the opening. Place a piece of masking tape at the center bottom of the glass, and another piece on the body. Place a mark on both pieces of tape that lines up as a reference line. Keep in mind that you will have to have a friend help with the placement of the glass, and you don't want to fight one another for the correct edge gap. (toward the end of this paper is a photo showing the masking tape and marks)
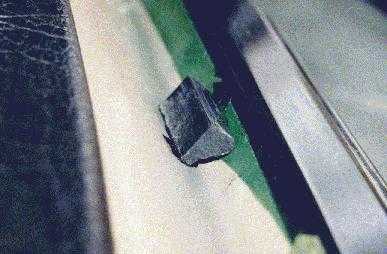
Replace the spacer blocks (new ones come with the 3M ribbon sealer). I like the idea of cutting the lower corner of the block so that water can run under it and not pond.
There are two methods to reseal the window back in. Most glass shops now use a sealer that comes in a tube that is similar silicon sealer. I've never used it and have heard stories about major messes.
The method that I use is the same that GM used (in 65). 3M makes the product called "Window-Weld Ribbon Sealer". It's 3M number is 08612 and is 3/8" diameter. They also make it in a smaller and larger diameter. It's my understanding that 3/8" diameter is the standard for all GM glass.
Prior to placing the "window-weld" ribbon, the area where it would touch the body had 3M "window-weld primer" brushed on. The smallest bottle of the stuff I could will last me a lifetime and only cost about 8 dollars. It's cheap insurance of a good seal.
The window-weld ribbon is REAL sticky and the second it touches anything it's stuck!! Start the roll at the lower center of the opening and work around back to the starting point. I place a dab of black silicone sealer at the point where they touch in order to ensure a good seal.
Prior to placing the glass, I have to make sure that two items are clear. It's the thickness of the ribbon that sets the gap between the body and the glass. The spacer blocks keep the window from moving downward toward the cowl and only comes in contact with the EDGE of the glass.
With that good, trustworthy friend, place the windshield's lower edge in position using the alignment line for positioning. Then just tilt the windshield back. Press against the glass to ensure a good seal. Due to how sticky this stuff is, you only have one chance to do it right.
Now all you have to do is snap the trim back in place.