"Buick Trademark(s) used with the written permission of General Motors"

You are going to have to remove the doors and everything in them. (Give some consideration to the fact that you may wish to remove the front fenders to adjust the doors later)
Read the instructions, they sound straight forward, but lack a lot of information unless you are familiar with working with doors and windows.
Take your doors off.
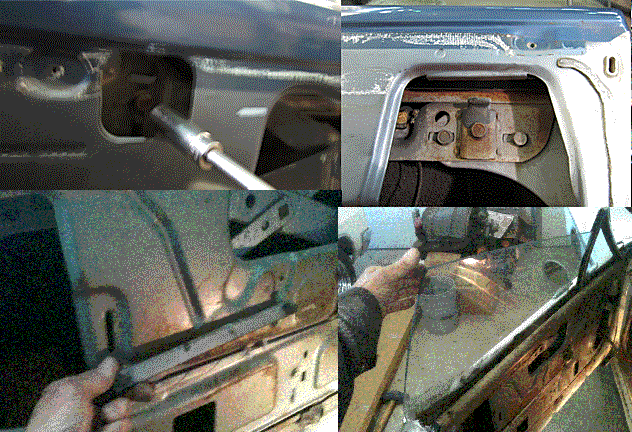
Remove two upper window stops and the rear window guide. Remove the window by lifting it up at the rear and sliding it out of the track.
Remove the vent window, three phillips screws (one hidden under the weather stripping), one bolt (near the front), and the two adjusting nuts. Loosen the window by shimmying it. You will work it up until the front comes clear of the door, the move it back a little and turn in to allow the adjusting screw to pull through the opening.(you may have to pry the outer and inner panels apart a bit).
Remove the four bolts that secure the crank mechanism and pull the mechanism out through the upper center hole.
Drill the four motor mounting holes as indicated in the instructions. We used a die grinder to open up the rectangular lock plate hole for the power regulator. Now you might as well get the 3 large holes on the door ends and the door jam. The instructions have been corrected in pen to reduce the size of the small holes from 1 3/8" to 1 1/8" and the large holes from 2" to 1 7/8". This is probably because the larger holes were not holding the grommets tight enough when opening and closing the doors. It would be nice if the hose used was a bit lighter. The hose supplied is split fuel line. It may be interesting to get the switch and motor plugs through the grommets.
Note that while it goes up, it is still not as good as it could be, not enough spring power!
We will look at the spring angle and see if we can tighten it up 1/8 turn.
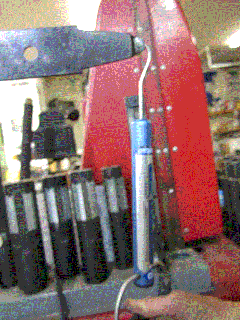
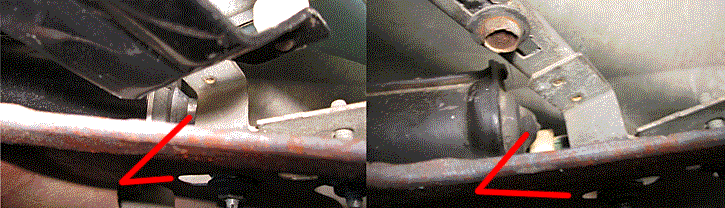
Here is how we measured the power window assist spring pressure. We found that when the ones on the kit supplied about 5 lbs. of assist while the OE ones supplied about 10lbs. This is why the windows had a hard time going up and couldn't make it to the top! When reinstalling the spring anchor turn it at least 45 degrees, 1/8 of a turn. You will find you are getting close to "coil bind", but you will get close to the required assist.
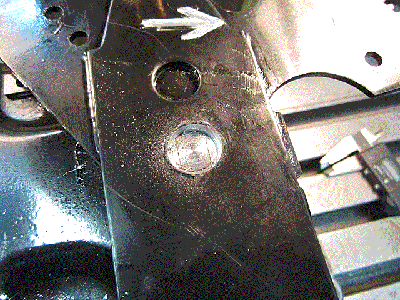
This image shows you exactly how the spring lock is mounted in the linkage. You can remove it using tools like an angle grinder or die grinder.
Move to the rear quarters. Dissemble everything and prepare to install!
It looks like it would be nice if the motor was about 3/4" shorter to allow proper adjustment of the track. It was good that an OE motor will work on this kit. It gives the desired clearance on the track and allow it to adjust. When using an original motor, it should have a couple of washers stacked under two of the bolts for it to sit square with the track.
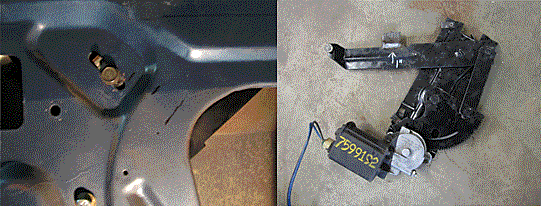
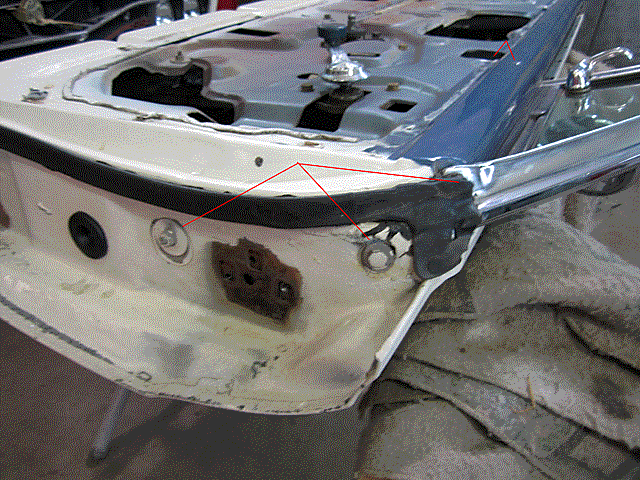
The next problem we ran into is that while the lift arm is a good replica of the original, it is not mounted at the same pivot point. The resulting problem is that the window arm does not come up against the window stop. The lines drawn on the door show where the arm should sit when the window is up, the arm is in the up position. The right position shows the one inch bumper added to stop the arm on the window stop.
When we went to put the switch in the door panel we started to square the round hole. As an afterthought we went over to the other door panel and simply pushed the switch into the round hole. That make a nice firm installation. Don't square the hole. You will have to square the drivers hole.:)