Installing a Set of Sway bars on a Buick GS
Tired of the roll in your Buick? Find it hard to imagine that anyone actually considered these cars to be sport oriented?
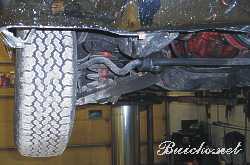
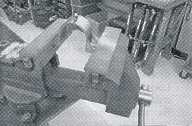
 It only takes a glance to know there is going to be big changes in the handling! Note the huge Hotchkis bar compared to the original equipment bar.
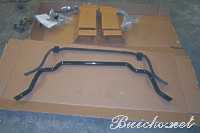
If it is roll reduction and handling improvement you wish to help, you may get away with just a front bar. It is pretty easy and economical to replace. When you add the rear bar, you must have suitable trailing arms. I will cover this later.
The instructions included with the bar are pretty basic, suitable for the simple job.
* * * * * * *
- Look carefully at the current installation.
- This installation can be performed without removing the front wheels. Always use proper safety devices such as jack stands or lift jacks to properly support the vehicle.
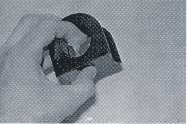
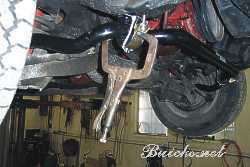
- Remove the factory end link from the car.
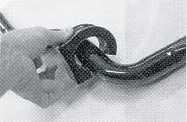
- Support or hold the center of the bar and carefully remove front bushing bolts.
- Remove factory bar from vehicle, taking note of the placement of the sway bar bushings.
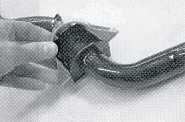
- Using the included white silicone grease, grease the inside of the urethane 1 7/16" in sway bar bushings. (The silicone grease can be cleaned up with WD40.)
- Install the urethane bushings on the bar. Make sure you position the bushing so when the bar is installed in the vehicle, the split will face the front of the car.
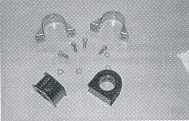
- Place the bushing's bracket over top the bushing.
- Install the new Install into the car using the included Cap Screws on the new brackets. This step will take some manipulating, as the original car was designed for a very small sway bar. You will need a 1/4" or a 6 mm Allen Driver socket for this. Our socket set is a much larger diameter than stack bar, and our Heavy Duty sway bar bushings and brackets are larger as well. You might find it easier to slightly squeeze the brackets together in a vice to allow you to better align the bracket holes with the original factory holes. Using a ratchet or air impact, install the screws with a washer under each head. This does work very well, you just need to use some torque to install these bolts. Have patience with this step.
- Install the new A-Arm end links using a ratchet and wrench.
- Tighten end link nut to the point where the end link bushing's diameter is just larger than it's support washer.
* * * * * * *
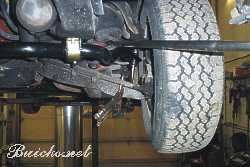
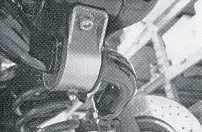
The bar that was coming out probably could have done a better job if the bushings on the end link had been replaced and tightened!
Align the bushings and brackets at the exact width or the original one before starting.
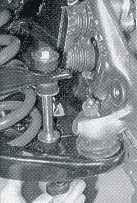
Start the rear bolt first. I found that by using a tie to hold the bushing in the bracket and squeezing the whole assembly with a set of vise grips the bolt started reasonably easily. Be careful not to cross thread them! If you can't get an Allen wrench into the head or the bolt, use a set of pointed vise grips or pliers to turn the bolts in two or three threads to be sure they are well started.
You will probably have to clamp the end link bolt up and pry the bar down a bit to get the nut started. Compare this bar to the original in the upper picture!
Now that the front is stable, CLICK HERE to see how I handled the rear.